

I love how my mind is always buzzing with ideas for creating beautiful things. The downside? I often juggle multiple projects at once, so it takes forever to finish anything.
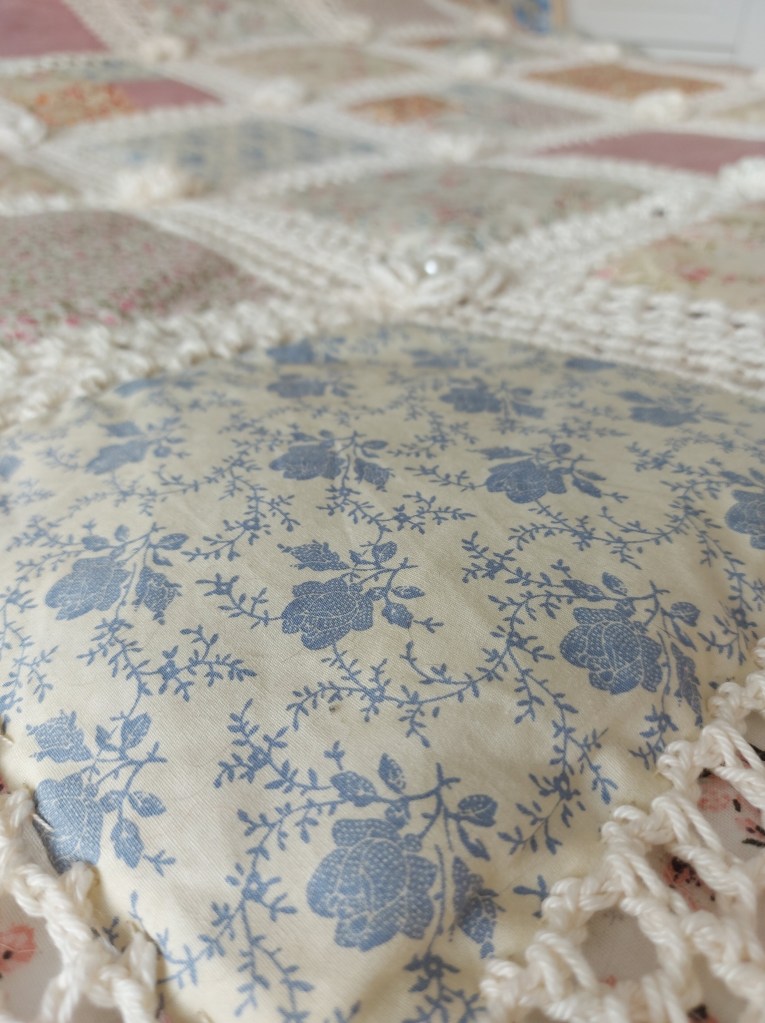
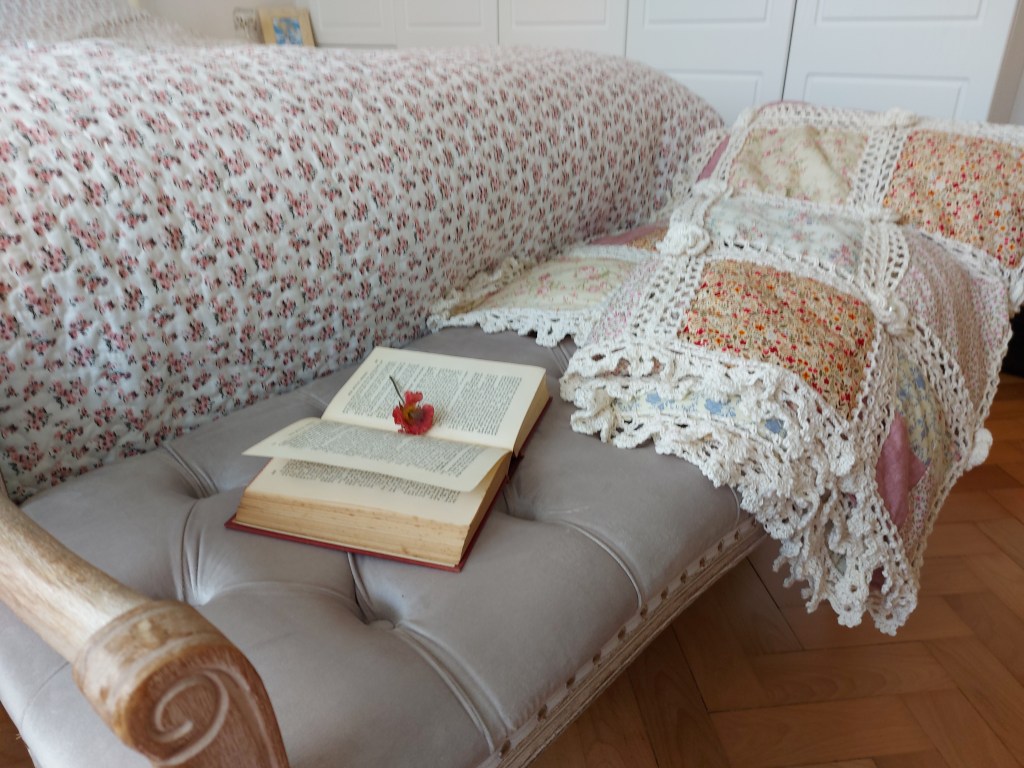
That’s why I’m especially proud of my latest achievement: completing this gorgeous fusion quilt for my Mum. It was originally meant to be a Mother’s Day gift in 2023, but I’ve just now finished it this week!
A fusion quilt is a fantastic project if you enjoy both sewing and crochet like I do. Keep reading to learn about the process of making one—I’ve included my own crochet patterns to inspire you to create your own.
You will need:
- Fat quarters in fabrics of your choice – I’ve used these
- Wadding
- A needle and thread
- Scissors
- A sewing machine
- Embroidery cotton – I’ve used this one
- A DK cotton yarn – I’ve used this one
- A tapestry needle
- Crochet hooks – size 3mm and 5mm
- 10mm Pearl beads
Instructions:
Begin by assembling your squares. Dimensions are completely up to you but I measured my fabric to be approximately 18cm x 18cm, allowing for seams. Add a square of wadding between each pair of squares before sewing with your machine to make your quilt super cosy. Make 56 squares.
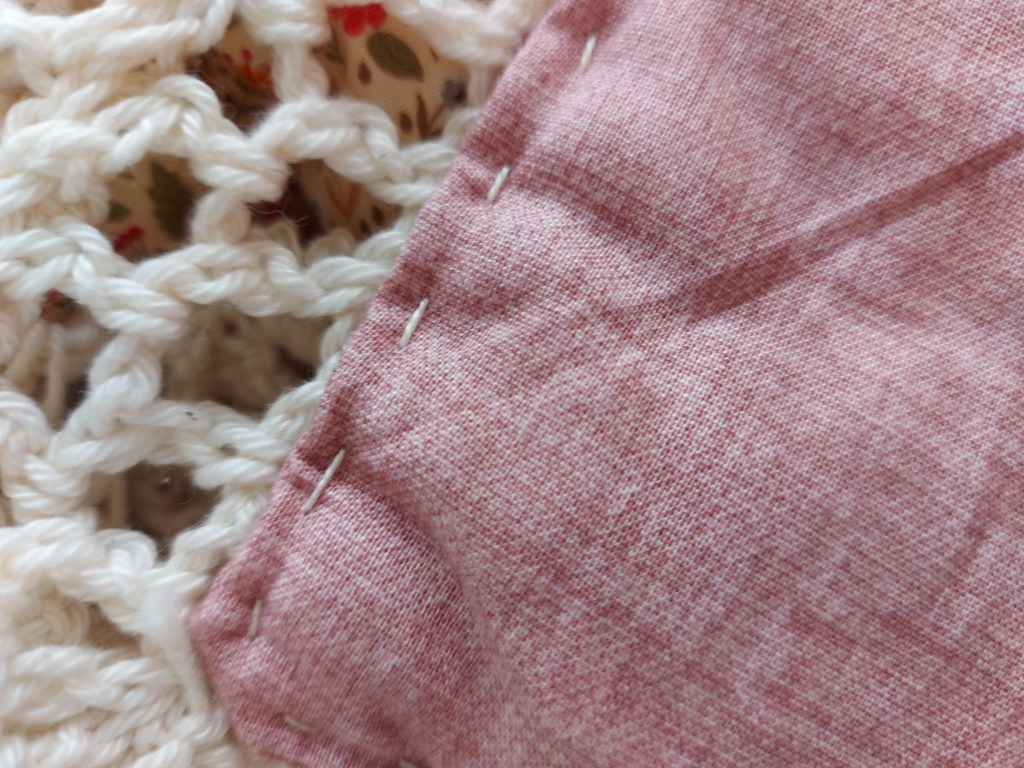
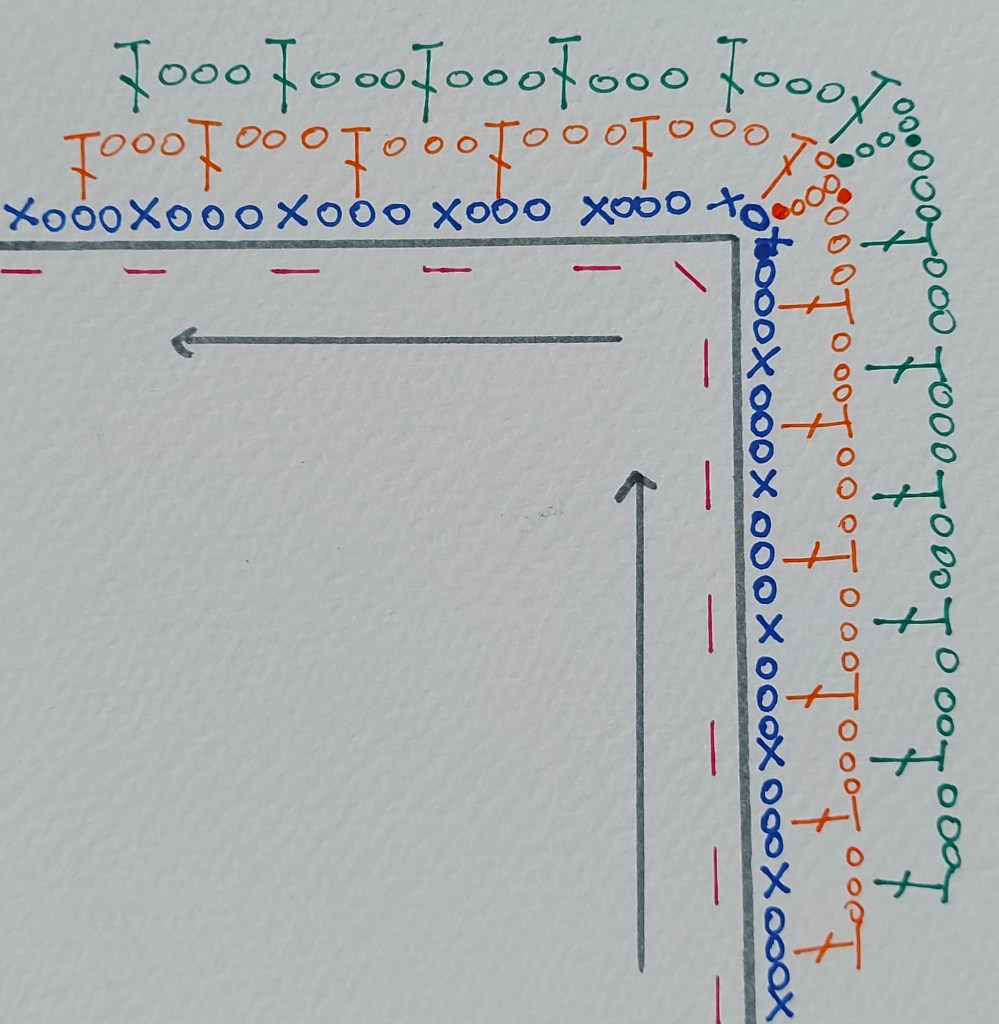
Once all of your squares have been made, you will need to make a base stitch in order to crochet your yarn to each square. Now, research suggests that you should use a ‘blanket stitch’ for this but I’m quite lazy so I just used embroidery thread to make a running stitch about 0.5cm away from the edges. It’s up to you – mine has held up quite well through the making process but I suppose it is still yet to stand the test of time! Aim to do the same amount of stitches on each side, on each square so that they all stay the same size and align easily with each other after crocheting. Also, in the corners, make a diagonal stitch (see fig. 1 crochet chart – the stitches are in pink).
After adding your preferred stitch to the borders of each square, it is time to start crocheting! I have used US crochet terms for this project but if you prefer UK terms, click here. For each square, you will need to work the following:
Round 1: Insert your 3mm hook into a corner stitch. Work (1sc, 1ch, 1sc) into the corner stitch. (ch3, 1sc into next stitch) – repeat along the side edge until you get to the next corner stitch where you will once again work (1sc, 1ch, 1sc), etc. To finish, slip stitch into first sc. (See blue round in fig. 1)
Round 2: Change to 5mm hook. Slip stitch into the 1ch space in the corner. 3ch (counts as 1st dc), 1ch, 1dc in same ch space. (ch3, 1dc into next 3ch space) – repeat along the side edge until you get to the corner 1ch space where you will work (1dc, 1ch, 1dc), etc. To finish, slip stitch into top of 1st 3ch. (See orange round in fig. 1)
Round 3: Repeat round 2 (see green round in fig. 1) Cast off.
Sew each of your squares together with yarn, lining up the edges.
For the trim around the edge of the whole quilt, you will need to work the following:
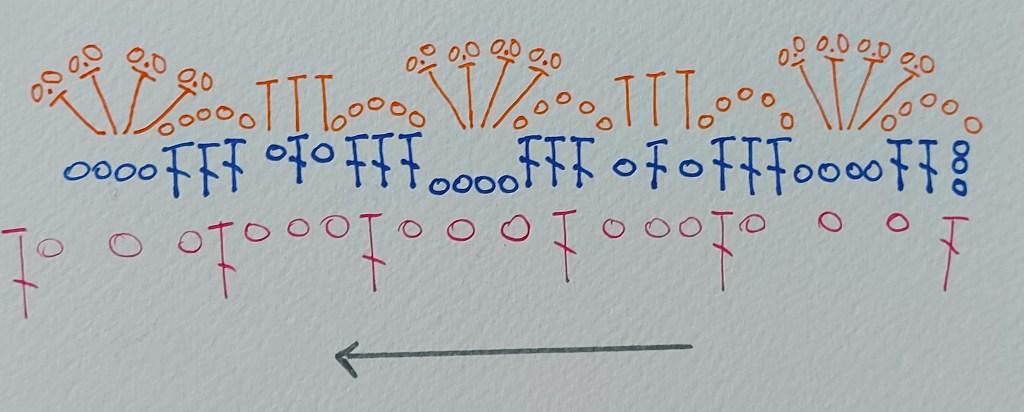
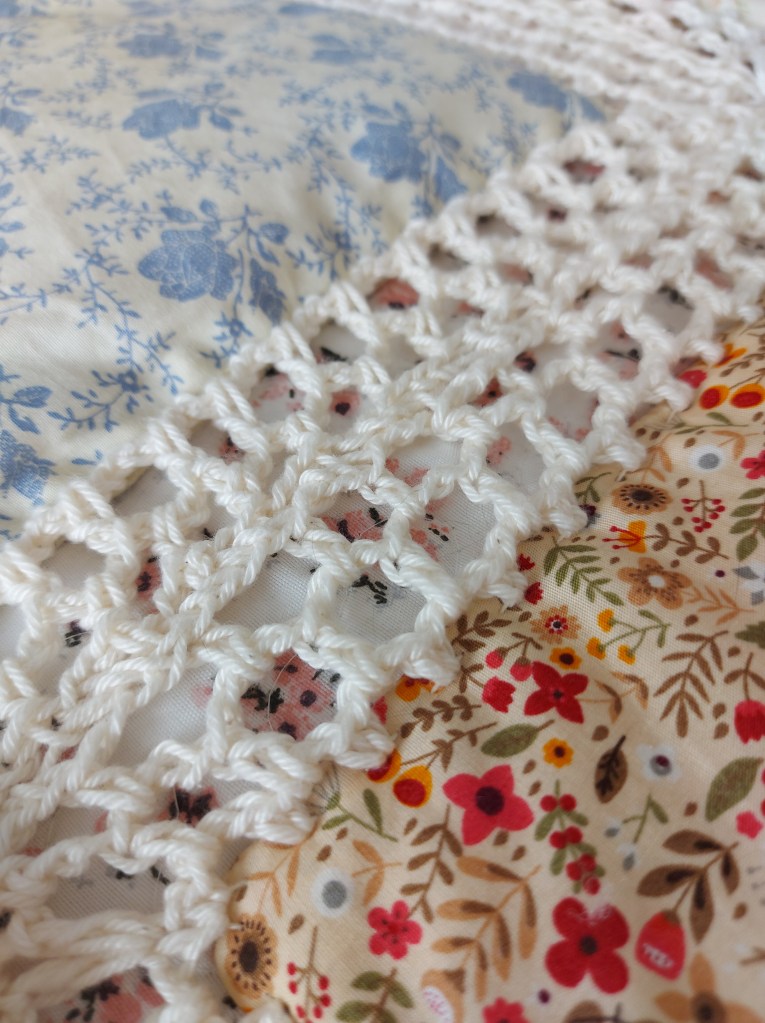
Round 1: Insert your 3mm hook into any 3ch space. Work (3ch (counts as 1st dc), 2dc, 4ch, 3dc) into the same ch space. *Ch1, 1dc in next ch space, ch1. In next ch space, (3dc, 4ch, 3dc)* Repeat from * to * all around the blanket. Slip stitch into top of first 3ch to finish round. (see blue round in fig. 2)
Round 2: *ch5, (1hdc, ch2, picot) four times in 4ch space, ch5, 1hdc in next ch1 space, 1hdc in dc, 1hdc in next ch1 space* Repeat from * to * all around the blanket. Slip stitch to finish round, cast off. (see orange round in fig. 2)
Crochet flowers
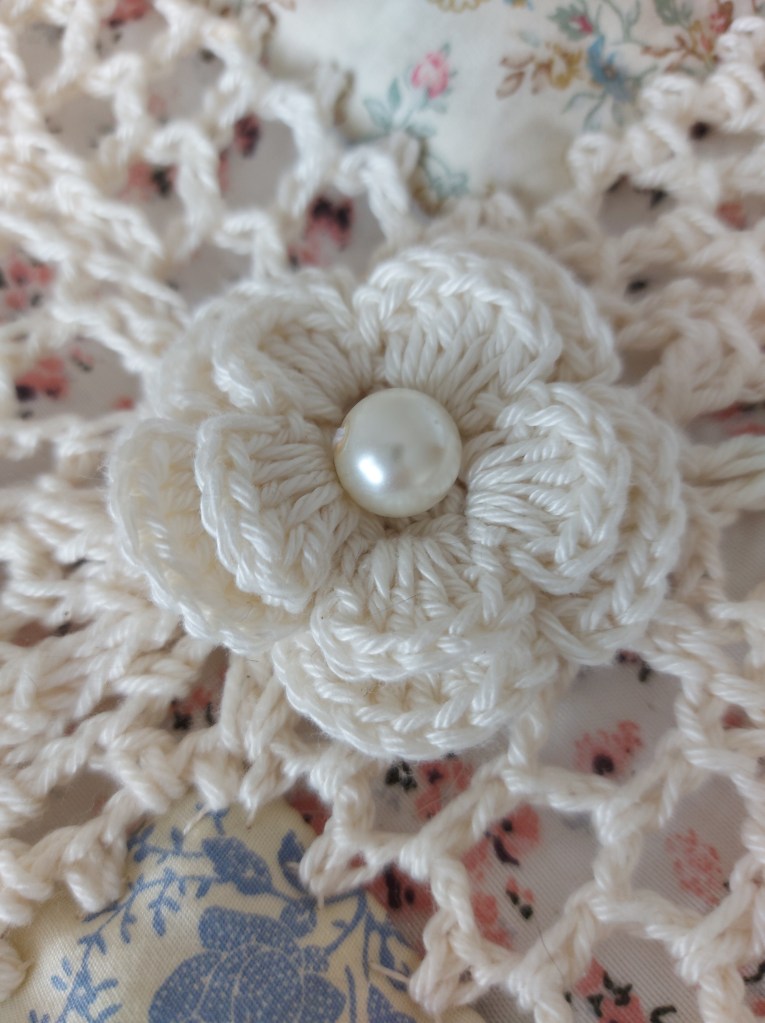
Flowers are worked using a 3mm crochet hook. If your blanket has 56 squares, you will need to make 42 flowers.
Round 1: 10sc into a magic circle
Round 2: 1sc, *ch3, skip next stitch, 1sc* repeat until you have 5 posts. Slip stitch into first sc.
Round 3: Slip stitch into 1st ch space. *ch1, 6dc in ch space, ch1, slip stitch into next ch space* repeat until you have 5 petals.
Round 4: Slip stitch into the back of the work. Work this round around the back of the flower: *bpsc, ch5* repeat until you have 5 chain spaces, slip stitch into beginning stitch.
Round 5: *ch1, 9dc into ch space, ch1, slip stitch into next ch space* repeat until you have 5 petals behind the front 5. Slip stitch to finish round. Cast off.
Sew a pearl bead into the middle of each flower and sew each flower into a gap between squares.
UK crochet terms
Square border:
Round 1: Insert your 3mm hook into a corner stitch. Work (1dc, 1ch, 1dc) into the corner stitch. (ch3, 1dc into next stitch) – repeat along the side edge until you get to the next corner stitch where you will once again work (1dc, 1ch, 1dc), etc. To finish, slip stitch into first sc. (See blue round in fig. 1)
Round 2: Change to 5mm hook. Slip stitch into the 1ch space in the corner. 3ch (counts as 1st tr), 1ch, 1tr in same ch space. (ch3, 1tr into next 3ch space) – repeat along the side edge until you get to the corner 1ch space where you will work (1tr, 1ch, 1tr), etc. To finish, slip stitch into top of 1st 3ch. (See orange round in fig. 1)
Round 3: Repeat round 2 (see green round in fig. 1) Cast off.
Trim:
Round 1: Insert your 3mm hook into any 3ch space. Work (3ch (counts as 1st tr), 2tr, 4ch, 3tr) into the same ch space. *Ch1, 1tr in next ch space, ch1. In next ch space, (3tr, 4ch, 3tr)* Repeat from * to * all around the blanket. Slip stitch into top of first 3ch to finish round. (see blue round in fig. 2)
Round 2: *ch5, (1htr, ch2, picot) four times in 4ch space, ch5, 1htr in next ch1 space, 1htr in dc, 1htr in next ch1 space* Repeat from * to * all around the blanket. Slip stitch to finish round, cast off. (see orange round in fig. 2)
Flower:
Round 1: 10dc into a magic circle
Round 2: 1dc, *ch3, skip next stitch, 1dc* repeat until you have 5 posts. Slip stitch into first dc.
Round 3: Slip stitch into 1st ch space. *ch1, 6tr in ch space, ch1, slip stitch into next ch space* repeat until you have 5 petals.
Round 4: Slip stitch into the back of the work. Work this round around the back of the flower: *bpdc, ch5* repeat until you have 5 chain spaces, slip stitch into beginning stitch.
Round 5: *ch1, 9tr into ch space, ch1, slip stitch into next ch space* repeat until you have 5 petals behind the front 5. Slip stitch to finish round. Cast off.

Leave a comment